Setting Up VPN on Windows Vista
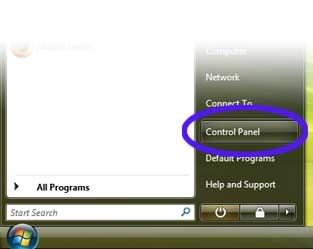
1. Click the Windows start orb and select Control Panel on the start menu.
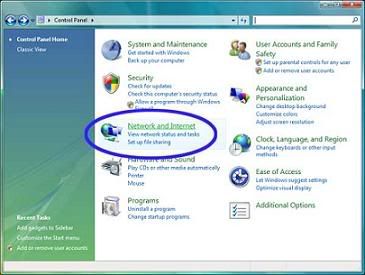
2. Click Network and Internet in the Control Panel.
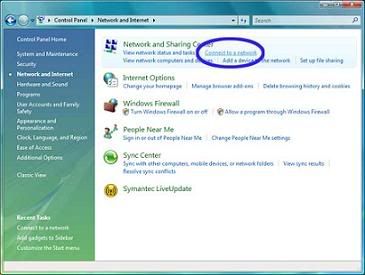
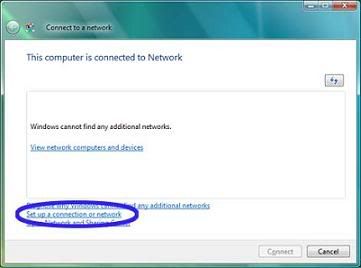
3. Under "Network and Sharing Center," click Connect to a Network.
4. Click Set up a connection or network.
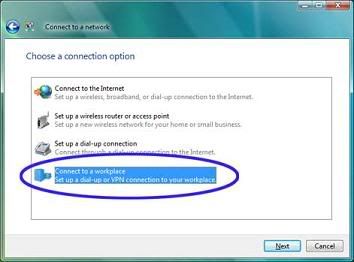
5. Double-click on Connect to a workplace to open the VPN setup window.
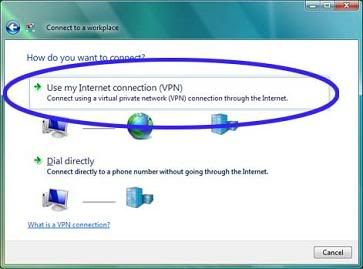
6. Select Use my Internet Connection (VPN).
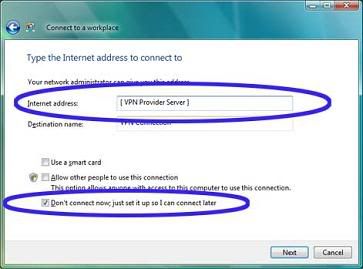
7. Enter the server address your VPN provider gave you in the Internet address field. Also check the box marked Don't connect now; just set it up so I can connect later. Click Next (in the lower-right corner of the window).
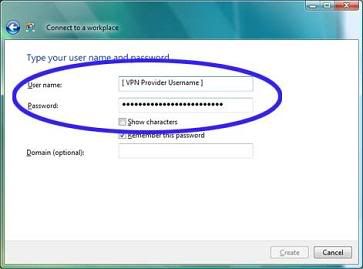
8. Enter the username and password your VPN provider gave you in the appropriate boxes, then click Create (in the lower-right corner) to finish setting up the VPN connection.
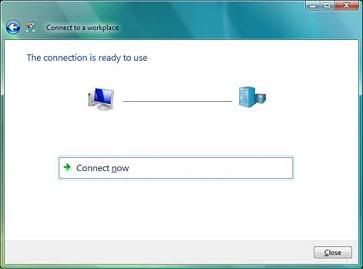
9. Click Connect now to connect to the VPN provider and start surfing securely and anonymously.